Is Yoga Enough to Build Strong Bones?

A recent AARP article claims that 5 yoga poses are especially effective at combatting bone loss in older adults.

When I first read the title of this article my spidey sense started to tingle.

Don’t get me wrong, I love yoga! I teach a weekly yoga class on Mondays at 6 pm P.T. focused on stretching, gentle strength exercises, balance, and mobility. It’s a great start to your week and the benefits can include:

  • stress reduction
  • improved sleep
  • improved balance
  • decreased muscular tightness
  • building community

One claim I don’t make about this class is that it will build stronger bones.

While these 5 poses, Warrior II, Tree Pose, Twisted Triangle, Standing Twist, and Hand to Foot, are weight-bearing exercises, is this enough (good) stress for your body to create new bone material?

The AARP article cites this study by Loren Fishman, M.D. medical director of Manhattan Physical Medicine and Rehabilitation in New York who claims “unlike running, biking, even weight training, a yoga pose involves holding sustained pressure on the skeletal system”. From 2005 to 2015 Dr Fishman studied 741 people who were already practicing yoga. Their average age was 68, and 83% had lower-than-normal bone density. They submitted DEXA scans of their hips and spines. They were given DVD’s with descriptions of the yoga poses and asked to log their yoga activity online.

Out of the original 741 participants, 227 practiced the routine at least every other day for two years, and 202 of those were women. The DEXA scans they submitted at the end of the study showed increased bone density in the spine and hip. None of the participants reported bone fractures or other injuries caused by doing yoga.

The study, published in 2015 in Topics in Geriatric Rehabilitation, does not provide conclusive evidence that yoga builds stronger bones.

Less than one-third of the study’s participants adhered to the yoga routine by practicing the poses at least every other day throughout the study, and just 43 submitted complete actual DEXA reports at the beginning and end of the study. “It gives one a reason to be cautiously optimistic, but a more complete study should be done,” says Dr. Marian Hannan, professor of medicine at Harvard Medical School.

So what’s the best possible outcome of this article?

Anything that gets people moving is a net positive!

If you’re not currently exercising, yoga is generally safe way to start.

While these 5 yoga poses may not help build stronger bones, they can improve your balance, lessening the chance of a fall (and the possibility of breaking a bone).

What’s my beef with this article?

It’s not enough.

Say you’re already doing yoga, and are familiar with these exercises, you keep doing them thinking that this exercise modality alone (and these 5 poses) will strengthen your bones.

You do not do any additional strength exercises that have been proven to build stronger bones.

By not educating people on how to properly build bone tissue we’re doing the public a disservice.

What do I recommend?

Do yoga! Stretch, work on your balance and flexibility, calm your mind. Keep up the good work!

And dedicate two days a week to strength training, specifically the exercises outlined in the LIFTMOR study. If you need help getting started give me a call.

Keep your eyes peeled here for my next article about menopause and bone density coming soon…

Anne McCranie is a Vancouver, Washington based personal trainer and licensed massage therapist. She is currently accepting new clients for both in person and zoom sessions.

Learn how to build strength, reduce stress, and eliminate chronic pain! Meet with me in-person.

Now scheduling Movement + Massage sessions in Vancouver, Washington!

Do you want to:

  • Feel strong and capable.
  • Make positive changes in your body composition.
  • Move your body without fear of injury.

Reach out to me this week!

Together we will come up with a plan customized to your needs, goals, lifestyle, and current season of life.

You’ll have a roadmap for how to take good care of you, moving your body in ways that feel good, feeding yourself delicious, nutrient dense foods, and taking time to rest your mind and body.

Your session may include:

  • Therapeutic exercises
  • Strength and balance training
  • Assisted stretching
  • Thai massage
  • Cranio Sacral Therapy

Call or email me today to schedule your session!

503 – 705 – 4762

Anne @ FluidPortland.com

High Protein Make Ahead Breakfast Casserole Recipe

Is one of your goals to improve your diet?

What you eat for breakfast can set you up for success for the rest of the day. I like to start my day with eggs and veggies. I make one of these egg casseroles about every other week, then portion it and freeze a couple of servings, whatever I’m not going to eat that week.

This is a great way to use up leftover meat or veggies and will get you well on your way to meeting your protein goals of 1-2 grams of protein per lb. of body weight per day. (I shoot for 20-30 grams of protein per meal).

This recipe is flexible, you can sub bacon or any cooked meat for the sausage. For added protein, blend a cup of cottage cheese until its smooth, and use that instead of sour cream.

Try this and let me know what you think!

Sausage and Egg Breakfast Casserole

Ingredients:

  • 1 tablespoon butter
  • 4 small potatoes, peeled and sliced thin
  • 1 lb pork sausage
  • 1 small bell pepper, chopped
  • 4 green onions, chopped
  • 4 cups of fresh spinach
  • 12 eggs
  • 1 cup sour cream
  • 1/4 cup milk
  • 1 teaspoon salt
  • 1/2 teaspoon pepper
  • 1 teaspoon garlic powder
  • 2 cups shredded cheddar cheese

Directions:

  1. Preheat oven to 350 degrees.
  2. Grease a 9×13 baking pan with butter.
  3. Layer potatoes on the bottom of the pan (you should have enough to just cover the bottom of the dish).
  4. In a large frying pan, cook the sausage on medium heat until it’s browned, breaking it up as it cooks. Add the peppers and onions and cook for another minute. Toss in the spinach and stir it around once or twice to wilt it (it will cook down a little more in the casserole).
  5. Spread the sausage mixture on top of the potatoes.
  6. In a large bowl, beat eggs with sour cream, milk, salt, pepper, garlic powder, and cheese until combined.
  7. Pour egg mixture over sausage.
  8. Bake for 35-45 minutes, until the eggs are just set and no longer jiggle.

Anne McCranie is a Vancouver, Washington based personal trainer and licensed massage therapist. She offers this recipe to tickle your tastebuds. Please see your medical professional for specific dietary advice.

Read more about protein guidelines for women over 50 here.

Can You Hang for One Minute?

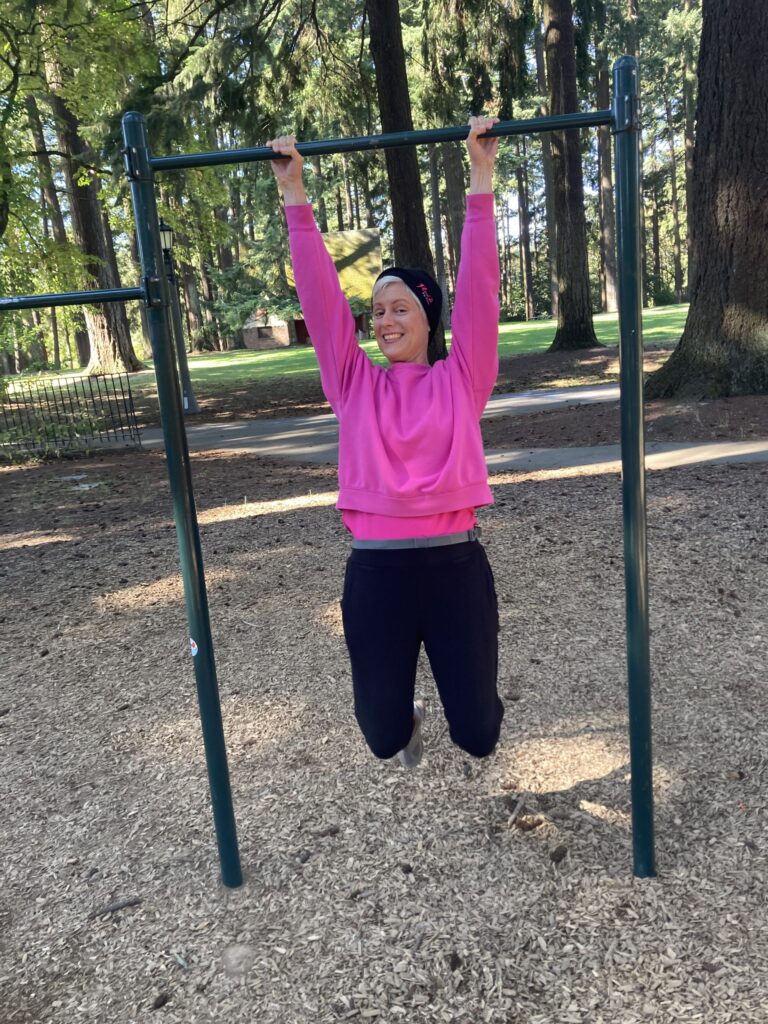
Can you hang from a bar for one minute?

One of your October Five exercises is hanging.

This week, can you look around your house or your neighborhood for a sturdy door frame, monkey bars, or other objects you could hang from?

Set a timer on your phone and see how long you can hang.

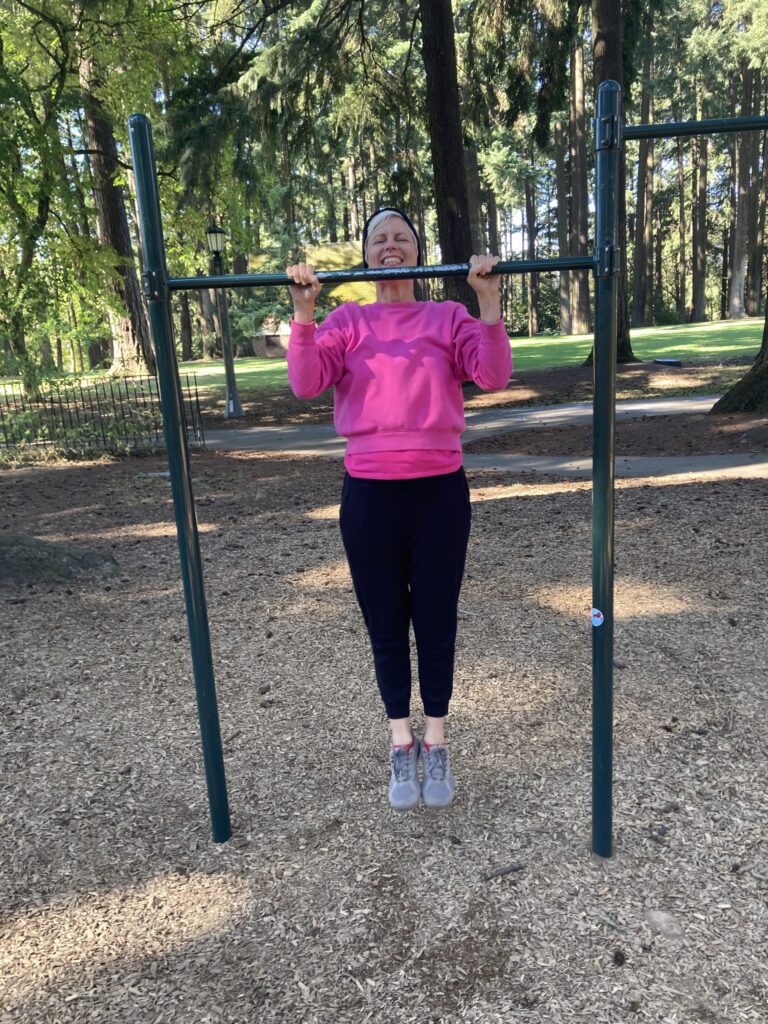
(these photos were taken in Sellwood park)

Studies have shown grip strength to be an indicator for longevity. Meaning those who have strong hands tend to live longer, have stronger bones, have better nutrition, fewer falls and fractures, and fewer mental health issues.

One way to improve your grip strength is by hanging.

In these photos I’m demonstrating a “dead hang”, where all your weight is supported by your arms.

If this is too much for your shoulders, start by reaching up and stretching your shoulders and back. Keep your feet on the ground so your legs can help support you.

Slowly over time you can build the mobility and strength to hang, and eventually to pull yourself up.

If you’d like help working your way up to a hang, please reach out to me this week. I have a safe and effective program to improve your shoulder mobility, upper back, and grip strength and you’ll be hanging in no time!

Anne McCranie is a Vancouver, Washington based Personal Trainer and Licensed Massage Therapist. She offers these exercises as a suggestion and encouragement to get moving. This is not a prescription, or specific medical advice. Please see your medical professional prior to starting a new exercise program.

Chicken Curry Recipe with Potatoes, Carrots and Coconut Milk

Fall is here!

This time of year, I love making soups, curries and stews. They’re versatile, easy to make and easy to freeze. Keep your eyes peeled here for more winter recipes coming soon…

This Chicken Curry recipe is in our regular rotation because it’s quick and easy and I can throw everything in the crock pot and a few hours later dinner is served!

If you choose to do a stovetop method instead of using a crock pot, follow the recipe and just simmer the curry in a pot for an hour or so on low.

You’ll need a large bowl, large pot, crock pot, and rice cooker or small pot with a tight-fitting lid.

Chicken Curry

Ingredients:

  • 1.5 – 2 lbs. boneless chicken thighs, cut into bite sized pieces
  • 1 teaspoon salt
  • 1/2 teaspoon pepper
  • 2 Tablespoons of curry powder
  • 1 Tablespoon coriander
  • 1 Tablespoon cumin
  • 1 Teaspoon cayenne powder
  • 2 Tablespoons of coconut oil
  • 1 small yellow onion, diced
  • 1 Tablespoon grated ginger
  • 2-4 cloves of garlic, chopped
  • 2-3 carrots, chopped
  • 4-5 small yellow potatoes, about 1.5 lbs, chopped
  • 1 red bell pepper, chopped
  • 1 can coconut milk
  • 1 jar curry sauce*
  • 1 small head of broccoli florets, chopped (about 1-2 cups)
  • 2 Tablespoons fresh cilantro, chopped
  • 1 cup basmati rice, rinsed
  • 1.5 cups water

Directions:

  1. Place chicken in large bowl and rub with spices (salt through cayenne).
  2. In large pot, heat oil over medium/ high heat.
  3. Cook onion for about 5 minutes, stirring it often to keep from burning. Add ginger and garlic and cook for another minute.
  4. Add the chicken and sear it for about 5 minutes, stirring occasionally.
  5. Add carrots, potatoes, bell pepper, coconut milk and curry sauce and bring to a simmer.
  6. At this point I put my curry in a crock pot and cook on low for 3-4 hours. Please use caution when transferring hot liquids from one pot to another. Once the potatoes are almost cooked (meaning, when I press then with a fork, the outsides give, but the insides are still a little hard) then I add broccoli. Cook for another half hour or so. If you like your veggies really mushy cook longer.
  7. If you’re not using a crock pot, just keep simmering the curry on the stove until all the veggies are cooked.
  8. Cook rice (click here if you need help with that).
  9. Serve curry over rice, with fresh cilantro on top.

Super quick n easy version:

  1. Dump the first 15 ingredients (everything from the chicken through the curry sauce) into your crock pot. Turn it on low for 6 hours, high for 4 hours. Poke the potatoes and when they’re nearly cooked, add the broccoli and cook for 30 minutes more.
  2. Cook a pot of rice.
  3. Ladle the curry over the rice and top with cilantro.

*The sauce used in this recipe (in the photo above) is from Costco. I’ve tried this curry sauce from Trader Joe’s, as well as this one from Safeway and they are both delicious. These are not affiliate links, meaning I make no money off you going to these sites, just wanted you to see what I meant by “1 jar of curry sauce” in the above recipe.

I use full fat coconut milk because it tastes better and has less additives than the reduced fat versions.

I’m Anne McCranie, a Vancouver, Washington based Personal Trainer and Licensed Massage Therapist. I love sharing good food and healthy recipes with you. Please see your medical professional for specific dietary advice.